Y3. Lesson 1. Legato & staccato
Prior learning: None
Duration: 30 minutes
Materials: Recorders, feathers
Keywords: Beat, rhythm, singing, chanting, partners, rhymes, circle games.
Difficulty: ![]()
Prepare
The recorder
Present
Staccato & legato
Practise
Major pentatonic

The term legato is derived from the Italian word "tied together." In legato, notes are played smoothly and connectedly, with no noticeable break or silence between them. It often involves a smooth transition from one note to the next. When playing a legato passage, a musician aims to create a seamless, connected line of sound.
Staccato, also from Italian, meaning "detached" or "separated," is the opposite of legato. In staccato, notes are played in a short, clipped manner with a clear break or silence between each note. This creates a distinct separation between sounds, creating a sharp, precise, and sometimes punchy rhythm. Staccato notes are often marked in notation with a small dot above or below the note head.
 Melodic development
![]() Students review known material.
Students review known material.
- Lead the class in singing the song.
- Students should sing the fourth phrase [Bow Wow Wow] in solfa and use hand signs.
- Teach that the 'do' pentatonic scale is formed from five pitches. It begins with the note 'do', and the word pentatonic translates to five tones or five notes.
- Remind the class that in this scale, there is a skip between the notes 'mi' and 'so' and steps between 'do' and 're,' 're' and 'mi,' and 'so' and 'la.'
- Lead the class in singing the do pentatonic scale up and down
- Ask individual students to sing the do pentatonic scale up and down.
 Questions
- How many skips are there in the pentatonic scale? [one]
- How many steps are there in the pentatonic scale? [three]
 Rhythmic development
![]() Students discover the difference between legato and staccato.
Students discover the difference between legato and staccato.
- Teach that legato is an Italian word for playing notes smoothly and connectedly, like a string of beads that are closely strung together. You can use the analogy of drawing a line without lifting the pencil off the paper.
- Explain staccato as playing notes in a short, detached manner. Compare it to hopping or jumping, where each note is like a little jump with a clear space between them.
- Use body percussion (clapping, patting, snapping) to demonstrate legato and staccato.
- For example, legato can be shown as a smooth swaying motion, while staccato can be demonstrated as sharp claps.
- Play the tracks on the audio player. For each, ask if the instrument is playing legato or staccato.
 Creative movement
![]() Students use creative movement to express legato and staccato.
Students use creative movement to express legato and staccato.

Legato movement:
Students are in a large circle. Play The Swan on the audio player and ask students to express themselves:
- Be a long, smooth, flowing ribbon that unrolls seamlessly without any breaks.
- Picture a gently flowing stream or river that moves without interruption, smoothly and continuously.
- Imagine swans gracefully gliding over a lake, moving in a continuous, unbroken line.
- Think of clouds drifting smoothly across the sky, merging seamlessly with one another.
- Be a paintbrush, making a long, continuous stroke on a canvas without lifting the brush.
Staccato movement:
- Play Rondo Alla Turca.
- They become individual raindrops hitting a surface, each creating a separate sound and impact.
- Imagine popcorn popping, where each kernel bursts separately in quick, short bursts.
- Imagine balls bouncing on the ground, each bounce distinct and separate from the others.
- Think of a computer keyboard, each key making a sharp, distinct sound and motion.
- Imagine fireworks exploding in the sky, each burst short and separate.
 Listening
![]() Students determine which phrase is legato and which is staccato.
Students determine which phrase is legato and which is staccato.
- Play the first phrase on the player.
- Ask students what instrument they are hearing.
- Ask if the phrase is legato or staccato. How did they arrive at the answer?
- Repeat with the other phrases.
 Visual learning
![]() Students discover how to mark legato and staccato.
Students discover how to mark legato and staccato.
- Project the score example on the board.
- Teach that legato is the word to describe where notes sound smooth and join together.
- A curved line is written from the first note to the last note.
- Staccato is the word used to describe short, separate notes.
- Depending on the note's tail, a dot is placed above or below the note.
- If the tail is down, the dot is above the note.
- If the tail is up, then the dot is below.
- Ask students to copy the graphic in their notebooks, paying attention to the curved lines and dots.
 Instruments
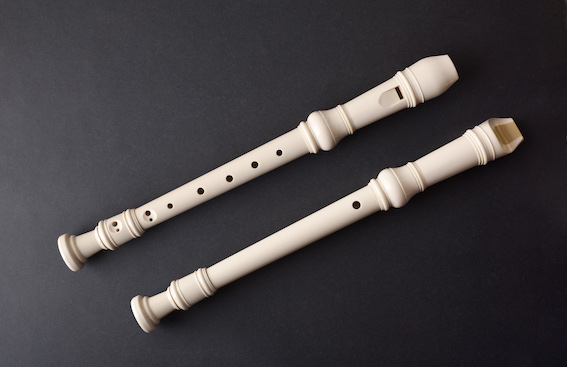
![]() Students begin to explore the recorder.
Students begin to explore the recorder.
Finger dexterity
- Three left-hand hand shapes can be used to prepare finger positions: the chicken, rabbit and unicorn [see images].
- Demonstrate each with your left hand and ask students to copy you.
- Call out two of the animals and ask students to show you the left-hand shapes. Then, choose other combinations and repeat. Finally, ask students to call out three animal combinations.
Breathing exercise with feathers
- Hand out craft feathers to students and have them hold them about 3cm from their lips.
- Tell the class to repeat various rhythm patterns of ta and ti-ti after you, ensuring the feather hardly moves by using only a tiny amount of air.
- Students should also [practice saying 'p's' and 'd's'.
- Let students take the feathers home to practice this exercise.
Holding and playing the recorder
- Distribute recorders to the class and show students how to hold the instrument correctly.
- Reminding them of the chicken hand, ensure students have their left thumb on the bottom hole, with their right thumb supporting the instrument.
- Instruct them to place the first finger of their left hand on the first hole and to blow with gentle feather air. Tell students the note produced is a B.
- Check each student in turn as they play B to ensure no squeakiness, over-blowing or incorrect fingering.
- If the class is successful, demonstrate rabbit fingers on your left hand and transfer to the recorder.
- Students should copy you and play the note A with gentle breath. tell them the name of the note.
- Finally, show the unicorn left-hand fingering, transfer it to the recorder, and students should copy you. tell them the note produced is a G.
- These exercises should be repeated in every learning period.
 Part work
![]() Students revise conducting in duple metre.
Students revise conducting in duple metre.

- Students will sing a simple song, like Rain Rain and conduct as they do so.
- Remind students that musicians raise their right hands in a sweeping motion, called conducting.
- To conduct in a duple metre, students hold their arms out in front of them and move their hands down on the first beat and up on the second. This motion is often called "beating time."
- The diagram to the left depicts the motion.
- Demonstrate the conducting motion in a duple metre.
- Tell students they will 'attach' their right hand to your hand and must follow your actions.
- Students sing and conduct the song.
 Assess
Suggested lessons
Y1. Beat II

Y1. Beat III
Y1. Beat IV