Prep. Lesson 27. Long & short sounds II
- Crayons, butchers paper Difficulty:
 Prior learning: None
![]()
Students will understand and demonstrate the concept of long and short sounds using body percussion and graphic notation.
 Success Criteria
- I can identify long and short sounds in a pattern.
- I can use my body to represent long and short sounds.
- I can create my own pattern of long and short sounds and represent it using graphic notation.
- Display a combination of upright rectangles (long sounds) and smaller squares (short sounds) representing 4 beats on the whiteboard.
- Without speaking, play the pattern on your body.
- Use a slow, smooth motion for a rectangle along your thigh or arm.
- Use a quick tap with your fingers, like a clave click for a square.
- Repeat the pattern a few times.
- Ask the class what they think you are demonstrating. Encourage them to describe their observations (e.g., "long and short sounds").
- Guide the discussion toward the idea of representing sound duration visually with shapes.
- Lead the class in playing the same pattern together on their bodies.
- Show another 4-beat pattern on the board, using a new combination of rectangles and squares. Then, play it together, reinforcing long and short sounds.
- Invite a student to come forward and create a pattern lasting 4 beats using body percussion.
- Ask the rest of the class to observe, then describe the pattern using "long" and "short" sounds.
- Draw the corresponding rectangles and squares on the whiteboard.
- Play the student’s pattern together as a group.
- Repeat the activity with more student-led patterns.
- Allow students to experiment with different combinations, encouraging creativity.
- Extension: introduce vocal sounds to represent long and short.
- Long (rectangle): A sustained "ahhh."
- Short (square): A quick "tuh" or "click."
- Practice one of the patterns vocally as a group.
![]() Students will explore and demonstrate the characteristics of short and long sounds through movement.
Students will explore and demonstrate the characteristics of short and long sounds through movement.

 Success Criteria
- I can describe the difference between long and short sounds.
- I can use movement to represent long and short sounds.
- I can identify long and short sections in music.
- Explain that music can have long and flowing sounds or short and quick.
- Play the music alternating between long, smooth, and short, sharp sounds.
- Perform movements to illustrate long and short sounds.
- Short sounds can have quick flicking motions, such as flicking water.
- Long sounds can have slow, continuous hand circles or flowing arm movements.
- Ask students to copy your movements as a response to the music.
- Ask students to describe what they observed in the movements. Prompt them with questions such as: "What did the flicking motions represent?" and "What about the slow, smooth movements?"
- Guide them to understand that the movements illustrated short and long sounds in the music.
- Have students stand in their own "bubble spot" (a space where they don’t touch others).
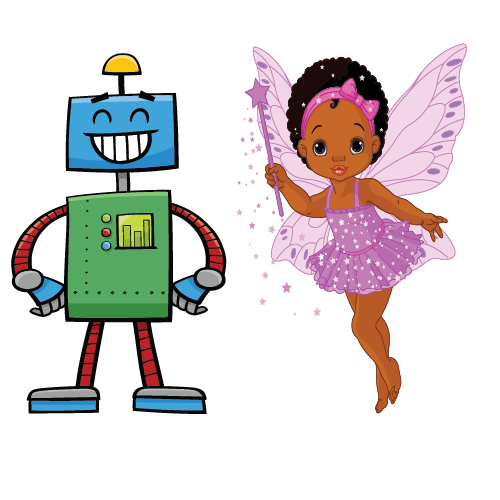
- Explain the concept of robots (choppy movements for short sounds) and fairies (flowy movements for long sounds)
- Robots have choppy, mechanical movements for short sounds (no sound allowed).
- Fairies have graceful, floating movements for long sounds.
- Play the music again and instruct students to respond with appropriate movements.
- Discuss the activity: "How did the music guide your movements?" and "What did you notice about the differences between short and long sounds?"
![]() Students will explore how visual patterns in a listening map represent musical characteristics and interpret these patterns in connection to the music.
Students will explore how visual patterns in a listening map represent musical characteristics and interpret these patterns in connection to the music.
 Success Criteria
- I can follow a listening map to understand the structure of a piece of music.
- I can describe how patterns like zigzags and circles represent musical qualities.
- I can connect visual patterns to the mood or feel of the music.
- Project the listening map onto the whiteboard and play the piece of music. Use a pointer to follow the patterns on the map in real-time, guiding students to observe the relationship between the music and the visuals.
- Pause the music and encourage students to share what they think the patterns represent.
- The smiling circles show short, choppy sounds, and the large circles show long, smooth sounds.
- Draw attention to the arrow and heart at the end of the listening map. Play the final section of the music and ask students why they think the map finishes with these symbols.
- Discuss how the arrow might represent music going high, while the heart could reflect the emotion or beauty of the twinkling sounds at the end.
- Reflect on the activity by asking students how the listening map helped them understand the music better.
- Questions like "Did the shapes on the map match what you heard?" and "How do visual maps help us listen more carefully?" can encourage deeper thinking.
![]() Students will explore and respond to musical contrasts through coordinated cup movements.
Students will explore and respond to musical contrasts through coordinated cup movements.

 Success Criteria
- I can identify and respond to choppy and smooth sections in the music.
- I can use tapping and passing movements to match the music.
- I can work collaboratively with my classmates to stay in time with the music.
- Ask the class to sit in a circle. Then, give each student a plastic cup, face down, and place it on the floor in front of them.
- Explain that the class will use the cups to perform movements that match the music’s choppy and smooth sections.
- Model the activity by joining the circle and demonstrating the movements.
- Tap the top of the cup on the beat for the choppy sections using alternate hands. Emphasise the sharp and steady nature of these movements.
- When the smooth section begins, grab the cup and pass it to the right, placing it in front of the next student. Ensure the movement is flowing and continuous to reflect the smooth nature of the music. Continue passing the cups until the music transitions back to the choppy section.
- Repeat the tapping for the choppy sections and passing for the smooth sections. Continue alternating between the two movements in response to the music until the piece finishes.
- Allow time to practice the activity multiple times, as it may take several attempts for the class to coordinate their movements smoothly and stay in time with the music.
![]() Students will respond to music by visualising what they hear, focusing on short and long sounds.
Students will respond to music by visualising what they hear, focusing on short and long sounds.

 Success Criteria
- I can listen carefully to the music and identify short and long sounds.
- I can draw shapes and patterns that match the music I hear.
- I can share my artwork and explain how it represents the music.
- Lay strips of butcher paper on the floor or table and give each child a crayon. Explain that the activity involves drawing what they hear in the music and creating their own listening maps.
- Ask the children to sit in front of the butcher’s paper.
- Play the music as before.
- Encourage them to respond to the sounds through their drawings when the music starts.
- For example, short and choppy sounds could be represented by zigzags, short straight lines, or dots, while long, continuous lines or curves could represent smooth and flowing sounds. Emphasise that their interpretation is personal as long as it reflects the music.
- Once the music finishes, ask the students to stand and walk around the paper as if visiting an art gallery, observing the designs their classmates have created. This allows them to see the variety of ways the music was interpreted visually.
- Invite a few students to share their drawings with the class, explaining why they chose particular shapes or patterns to represent the music. This encourages reflection and critical thinking about the relationship between sound and visual representation.
![]() Students will analyse a song to identify long and short sounds and represent them using graphic notation.
Students will analyse a song to identify long and short sounds and represent them using graphic notation.
- Explain to the class that they will test their listening skills by mapping the sounds of a familiar song, “Rain, Rain, Go Away.”
- Discuss how long and short sounds are represented, with rectangles for long sounds and squares for short sounds.
- Revisit the song by singing it together as a class. Work together to identify which parts of the song contain long and short sounds. Use body movements to illustrate this.
- Long sounds by slow, sweeping strokes with hands or arms.
- Short sounds by tapping fingers together quickly.
- Work through the song bar by bar, deciding on the shape for each sound. On the board, draw rectangles for long sounds and squares for short sounds.
- Invite selected students to come up and add shapes if time allows.
- After completing each line, test it as a class by performing the sounds on their bodies and singing the corresponding lyrics. Discuss whether the shapes accurately represent the sounds and make adjustments if needed.
- Once the map is complete, perform the entire song as a group.
- Combine singing with body movements, and check that the map matches the music. Then, reflect on whether the sounds were accurately represented and whether enough shapes were included.
 Success Criteria
- I can identify long and short sounds in the song.
- I can represent these sounds using rectangles and squares.
- I can perform the song using both movement and singing, checking the accuracy of the sound map.
Suggested lessons
Y1. Beat II

Y1. Beat III

Y1. Beat IV

