Level 1. Lesson 9. High & low sounds
![]()
![]() Woodblock
Woodblock
Difficulty: ![]()
Prior learning: None
Prepare: so & mi Present: Practice: ta & ti-ti
![]()
Students will explore pitch by matching their voices to high and low sounds while following visual cues with arm movements.
 Questions
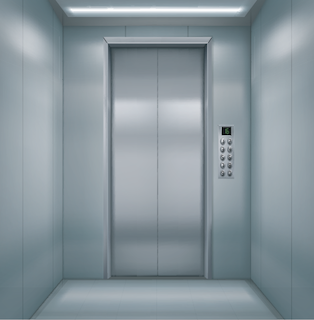
- What did you notice about your voice when the elevator went up?
- What about when it came down?
- If high sounds go with high movements, what movements are for low sounds?

- Explain that we’re going to use our voices like an elevator. When the elevator goes up, our voices will go higher. When it goes down, our voices will go lower.
- Demonstrate raising your arms high for a high pitch and lowering them for a low pitch. Use neutral syllables like "ooh" or "ahh" to demonstrate the sound.
- Lead the class in a warm-up: Start with a low "ooh" sound and gradually raise your arms, encouraging students to follow your pitch as it gets higher.
- Lower your arms, bring the pitch down, and have students match the sound.
- Use variations like "ahh" or "mmm" to explore different vocal sounds.
- Introduce a pretend “elevator” by moving your arms unpredictably up and down. Have students follow your movements and adjust their pitch accordingly.
- Challenge students to respond quickly to changes, making it a fun and dynamic warm-up.
- Invite volunteers to take turns being the “elevator operator,” leading the arm movements while the class follows their pitch.
 Success Criteria
- I can match the pitch of my voice to high and low sounds.
- I can follow the teacher’s arm movements to adjust my voice.
- I can demonstrate an understanding of high and low sounds through my singing.
![]()
Students will learn to sing, clap the beat, and participate in a rhythm-based circle game that encourages coordination and listening.
- Begin singing the song with the whole class clapping the beat.
- Arrange the students in a circle, either standing or sitting.
- Explain the game's rules and ensure everyone understands how the game is played.
- Select one student to be "it" and give them a small prop, like a purse or bag, representing the "pocket."
- Explain that this student will skip around the circle while the rest of the class sings and claps.
- The chosen student skips around the circle, holding the pocket and moving in time with the beat.
- At the end of the song, the student drops the pocket behind one of the seated or standing students in the circle.
- The student standing in front of the dropped pocket must stand up and chase the student who dropped it around the circle.
- The goal is for each student to race back to the empty position first.
- The student who reaches the empty spot in the circle first is the winner and joins the circle, while the other student becomes the next one to hold the pocket.
- Repeat the game with a new student holding the pocket, allowing everyone to take turns.
 Success Criteria
- I can sing and clap the beat with the class.
- I can skip around the circle in time with the beat.
- I can follow the rules of the game and participate actively.
- I can chase and be chased in a safe and friendly way around the circle.
![]() Lyrics
Lyrics
Lucy Lockett lost her pocket, Kitty Fisher found it.
Not a penny was there in it, only ribbon 'round it.
 Questions
- Who lost her pocket? [Lucy]
- Who found it? [Kitty Fisher]
- How much money was in it? [None]

![]() Students will develop their listening and singing skills by identifying pitch, keeping the beat, and following melodic contour with arm movements.
Students will develop their listening and singing skills by identifying pitch, keeping the beat, and following melodic contour with arm movements.
![]() Lyrics
Lyrics
Hey, hey, look at me,
I am clapping, you can see.
- Teach that we will sing a song, keep the beat, and listen carefully to the sounds we hear. We’ll also use our arms to show whether the melody is high or low.
- Demonstrate the arm movements: Raise arms for high sounds. Lower arms for low sounds.
- Sing the song to the class, keeping a steady beat.
- Ask students to repeat the song after you.
- Emphasise keeping the beat by clapping or tapping gently on their knees.
- Ask students: “How many different sounds did you hear in the song?” “Did the song start on a high or low sound?”
- Sing the first line again if needed to help them decide.
- Sing the song again as a class, encouraging students to raise their arms for high sounds and lower their arms for low sounds.
 Success Criteria
- I can sing the song and repeat it accurately.
- I can keep the beat while singing.
- I can identify whether the song starts on a high or low sound.
- I can raise or lower my arms to match the melody.
 Questions
- How many different sounds did you use in the song? [Two]
- Did the song start on a low or high sound? [High]
- How can we show a high or low sound? [Arms raised or lowered]
![]()
Students will identify high and low sounds while listening attentively and associating them with physical movements.
 Questions
- Which instrument sound did you like best?
- Do you like high sounds or low sounds best?
- Which was easier to recognise, the high sounds or the low sounds? Why do you think that is?
- Explain that we’re going to listen carefully to some sounds. Your job is to decide if the sound is high or low.
- Demonstrate the actions: Touch your head for high sounds. Touch your shoulders for low sounds.
- Play an audio file containing a high and low sound.
- Pause after each sound to allow students to respond by touching their heads or shoulders.
- Ask the class if the sound is high or low.
- Replay sections of the audio and ask students to guess which instrument is producing the sound. [At this level, it may be difficult for students, but it is good for them to hear different instruments]
 Success Criteria
- I can touch my head for high sounds and my shoulders for low sounds.
- I can distinguish between high and low sounds in the audio.
- I can identify the instrument producing the sound.
![]()
Students will explore and identify high, low, and middle sounds through singing and hand movements that match melodic contour.
- Explain that we’ll discover that some sounds are high, some are low, and some are in the middle. We’ll use our hands to show where the sounds are.
- Demonstrate the hand movements:
- If you hear a high sound, raise your hand high. If you hear a low sound, lower your hand. If you hear a middle sound, place your hand at chest level.
- Sing the song to the class line by line, using a gentle voice.
- Raise your arm high for high sounds, lower it for low sounds, and keep it at chest level for middle sounds.
- Have students echo each line while copying your hand movements.
- Once students are familiar with the song, sing it as a group.
- Encourage them to sing and use hand movements to follow the melody’s contour.
- Repeat until most students are confident with both singing and movements.
![]() Lyrics
Lyrics
I can sing high. I can sing low.
Now I'm in the middle and don't know where to go.
My voice goes here!
 Success Criteria
- I can match my hand movements to the melody as I sing.
- I can identify and sing high, low, and middle sounds.
- I can demonstrate the melody by following hand movements accurately.
 Questions
- What happens to your hand when the song goes higher? Can you show me?
- What happens to your hand when the song goes higher? Can you show me?
- How can you tell when a sound is in the middle? What does it look like with your hand?
![]() Students will perform a song while identifying beats and rhythm, using ta and ti-ti time names to represent the rhythm.
Students will perform a song while identifying beats and rhythm, using ta and ti-ti time names to represent the rhythm.
- Print and distribute the empty beat sheet or distribute their books [My first music writing book p.10]
- Sing with the class while students point to the beat circles.
- Remind students when we hear one sound on a beat, we say ‘ta.’ When we hear two sounds on a beat, we say ‘ti-ti.’ These are called rhythm syllables or time names.
- Write the symbols on the board.
- Clap and say the rhythm of the song's first line, using ta and ti-ti, while pointing to the circles.
- Have students repeat the song while clapping the words.
- They repeat the song by tapping the rhythm in each beat circle.
- Students write the symbols for one sound on the beat [ta] and two sounds on the beat [ti-ti] in each circle.
- Project the second sheet on the board with the correct answers. [click the navigation arrow of the viewer]
- Lead the class in singing the song again, using ta and ti-ti instead of the lyrics.
- Finish by singing the lyrics of the song.
 Questions
- How many beats in the song? [eight]
- How many sounds are on the first line? [four]
- What are two sounds on a beat called? [tit-ti]
 Success Criteria
- I can sing the song while pointing to the beat circles.
- I can identify the rhythm of the song using ta and ti-ti time names.
- I can sing and clap the rhythm while keeping to a steady beat.
![]() ASSESSMENT QUESTIONS
ASSESSMENT QUESTIONS
- The student can
- The student can
- The student can

Suggested lessons
Y1. Beat II

Y1. Beat III

Y1. Beat IV

