Level 1. Lesson 10. High & low sounds on a single-line staff
![]()
![]() Woodblock
Woodblock
Difficulty: ![]()
Prior learning: None
Prepare: so & mi Present: Practice: ta & ti-ti
![]() Students will identify high and low sounds in a song and how to place them on a one-line staff.
Students will identify high and low sounds in a song and how to place them on a one-line staff.
- Sing "Goodnight" with the class, encouraging them to use their best singing voices.
- Ask: “Can you hear where the song has high sounds and where it has low sounds?”
- Sing the song again, but instead of the usual words, say we’ll only sing the words 'high' and 'low.'”
- Model this for the class, then invite them to sing along.
- Repeat until students confidently use "high" and "low" to match the melody.
- Draw a horizontal line on the board and an 'h' above the line.
- Explain that the high sounds of the song sit above the line, and the low sounds sit below the line.
- Ask a volunteer to draw the next symbol [l]. Offer gentle guidance by singing the note.
- Repeat this with other students until the sequence is complete.
- Extension: the second graphic shows the high and low symbols replaced with dots. This may be taught in the next lesson or introduced here, depending on class ability.
 Success Criteria
- I can sing the song "Goodnight" with high and low sounds.
- I can recognise and describe how high and low sounds are shown on the musical staff.
- I can sing the song using only the words "high" and "low."
 Questions
- Why is there a line?
- Where do high notes go? [above the line]
- Where do low notes go? [below the line]
![]() Students will engage in a group singing activity, develop coordination by miming movements, and participate collaboratively in turn-taking.
Students will engage in a group singing activity, develop coordination by miming movements, and participate collaboratively in turn-taking.
![]() Lyrics
Lyrics
Little Sally Water, sitting in a saucer.
Rise Sally, rise Sally, wipe away your tears, Sally.
Look to the east, Sally, look to the west, Sally.
Look to the one who you know the best.
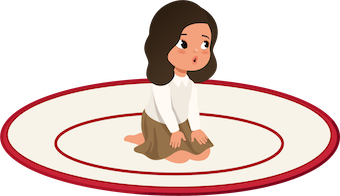
- Tell students we’ll sing a song and take turns being 'Sally.'
- 'Sally' will act out the song’s movements in the middle of the circle, and at the end, they’ll choose the next person to be 'Sally.'”
- Sing the song to the class, ensuring everyone knows the melody and lyrics.
- Choose a volunteer to help demonstrate the activity.
- Sing the song while the volunteer acts out the movements indicated by the lyrics.
- Show how 'Sally' points to another student at the end of the song to choose the next 'Sally.'
- Begin the game with one student as 'Sally' in the centre.
- Sing the song while 'Sally' mimes the movements.
- At the end of the song, 'Sally' points to a new student to take their place.
- Continue until all students have had a turn or as time allows.
 Success Criteria
- I can sing the song confidently with my classmates.
- I can mime the movements described in the lyrics when chosen as 'Sally.'
- I can take turns and cooperate with others during the activity.
 Questions
- What did you enjoy most about being 'Sally' in the centre of the circle?
- How did the movements help you connect with the lyrics of the song?
- What was the easiest or trickiest part of the game for you, and why?

![]() Students will identify high and low sounds that are a minor third apart and associate them with corresponding physical movements.
Students will identify high and low sounds that are a minor third apart and associate them with corresponding physical movements.

 Questions
- Where would you write a high sound [above the line]
- What about a low sound [below the line]
- Which movement—stretching up or crouching down—was the easiest or most fun for you?
- Explain students will listen to sounds that are close together but still high and low. We’ll show these sounds with our movements.
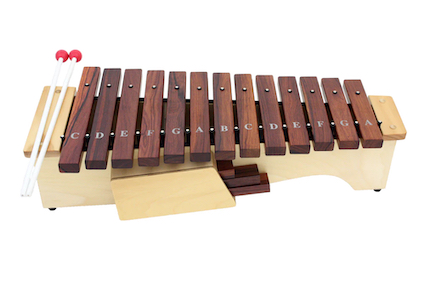
- Demonstrate on a tuned percussion instrument (e.g., xylophone or glockenspiel), playing high and low notes that are a minor third apart, e.g. C & A.
- Ask students to listen carefully to hear the difference.
- Invite a student to the front and teach them the two notes you played on the instrument.
- Ask the class: “Which note was high, and which was low?”
- Reinforce understanding by repeating with another student.
- Demonstrate the physical movements for high and low sounds, e.g., stretching up or touching heads for high sounds and crouching down or touching shoulders for low sounds.
- Play a sequence of minor third notes on the instrument and have the class respond with the corresponding movements.
 Success Criteria
- I can identify high and low sounds played on an instrument.
- I can demonstrate high and low sounds using arm movements or body positions.
- I can actively listen and respond to patterns of high and low sounds.
![]() Students will create new lyrics and movements for a song, enhancing their rhythmic understanding and creativity through singing and physical engagement.
Students will create new lyrics and movements for a song, enhancing their rhythmic understanding and creativity through singing and physical engagement.
![]() Lyrics
Lyrics
This is the way we tap our heads,
Tap our heads, tap our heads.
This is the way we tap our heads,
When we sing this song.
This is the way we clap our hands,
Clap our hands, clap our hands,
This is the way we clap our hands,
When we sing this song.
This is the way we slap our thighs,
Slap our thighs, slap our thighs.
This is the way we slap our thighs,
When we sing this song.
This is the way we stamp our feet,
Stamp our feet, stamp our feet.
This is the way we stamp our feet,
When we sing this song.
 Questions
- Which movement was the most fun to do, and how did it match the beat?
- How did you feel when creating new lyrics for the song? Was it easy or tricky?
- Why do you think keeping the beat when singing and moving together is important?
- Teach students will have fun creating new words and movements for ‘Mulberry Bush.’
- Practise the original version to ensure everyone knows the melody and rhythm.
- Arrange students in a circle and demonstrate the first new verse.
- Example: "This is the way we tap our heads, tap our heads, tap our heads."
- Tap your head to the beat while singing, and encourage students to copy you.
- Sing the first new verse again while students tap their heads to the beat.
- When secure, introduce the next verse with a new movement (e.g., clapping hands).
- Invite students to suggest new lyrics and movements. Example: "This is the way we stomp our feet" or "This is the way we wave our arms."
- Incorporate each suggestion into the song, ensuring students maintain the beat and perform the actions accurately.
 Success Criteria
- I can follow the beat by performing the actions in time with the music.
- I can contribute new lyrics to the song.
- I can sing and perform the actions confidently with the class.
![]()
Students will learn to sing, keep the beat, and participate in a circle game that involves coordination, timing, and teamwork.
![]() Lyrics
Lyrics
Skip, skip to the barber shop,
I left my hat at the barbershop,
And three sticks of candy.
One for you, one for me,
And one for [sister/brother] [students name]
- Have the students form a seated circle on the floor, ensuring everyone can see each other.
- Select one student to be the Leader and give them a prop, like a cap, to hold.
- Explain that the Leader will skip around outside the circle while the class sings.
- Sing "Skip to the Barbershop" with the class.
- Encourage students to keep the beat on their knees by patting them in time with the song.
- The Leader begins skipping around the circle while the class sings the song.
- They look for students to place the cap on according to the song’s lyrics.
- "One for you": The Leader gently places the cap on a seated student's head, then takes it off.
- "One for me": The Leader puts the cap on another student's head and then takes it off.
- "One for sister/brother [Student's Name]": In this line, the Leader places the cap on a final student, who becomes the next Leader.
- Repeat the game, allowing the new Leader to skip around the circle and continue the process.
- Ensure everyone is singing, keeping the beat on their knees, and paying attention to the game.
- Offer guidance and encouragement, helping students stay in time and take turns smoothly.
- Continue the game, allowing multiple students to take turns as the Leader.
 Success Criteria
- I can sing and keep the beat on my knees.
- I can take turns as the Leader and follow the song’s directions.
- I can place the cap on students in time with the lyrics.
- I can work cooperatively with my classmates and enjoy the game.
 Questions
- What is a barbershop?
- What piece of clothing was left there?
- What else was left?
![]() Students will read and perform rhythm patterns using ta and ti-ti syllables, developing rhythm-reading and performance accuracy.
Students will read and perform rhythm patterns using ta and ti-ti syllables, developing rhythm-reading and performance accuracy.
- Project the rhythm patterns for the first song on the board or hand out printed copies.
- Point to each symbol (ta and ti-ti) and review their meanings: ta = one sound on a beat (clap once), ti-ti = two sounds on a beat (clap twice quickly).
- Lead the class in clapping and speaking the rhythm pattern for the first song.
- Ask the name of the song- improves inner hearing.
- Clap and speak the rhythm together as a class.
- Choose a student to read the first song back.
- Repeat the process with the second song.
- Ask the name of the song.
- Clap and speak the rhythm together as a class.
- Invite additional volunteers as time allows.
 Success Criteria
- I can read and clap the rhythm patterns accurately.
- I can speak the rhythm using ta and ti-ti syllables.
- I can perform the rhythm patterns confidently in front of the class.
 Questions
- How can you tell the difference between ta and ti-ti in the rhythm patterns?
- What did you find easy or tricky about clapping and saying the rhythm?
- Why do you think practising rhythm with ta and ti-ti is important in music?
![]() ASSESSMENT QUESTIONS
ASSESSMENT QUESTIONS
- The student can identify high and low sounds, representing them visually.
- The student can identify ta and ti-ti rhythm syllables.
- The student can improvise lyrics to a known song.

Suggested lessons
Y1. Beat II

Y1. Beat III

Y1. Beat IV

